Step 1: Execute Install Client

Select Computer Management > Collections > All systems > Right Click > Install Client
 The system will open Client Push Installation Wizard. Click Next
 For the installation options, Tick all options
 Then, the system will start to initiate Client Push Installation to deploy the sccm client.
Step 2: Verifying the sccm agent installation via Control panel
Wait for few minutes for the sccm client installation.
Here is the new component listed in the client Control Panel

-Configuration Manager
-Program download
-Remote Control
-Run Advertisement

This is the Configuration Manager general tab

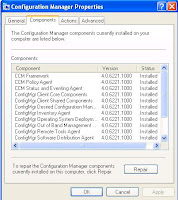
This is the Components tab which listed all the component install in the client computer.

This is the Action tab

This is the Advanced Tab which indicated LAB- site code and cache size set to 8000.
Step 3: Verifying from the log files
If any problem arise, you can always go to C:\Windows\System32\ccmsetup and check the log files.
 -CCMSetup.log -Records setup tasks performed by CCMSetup.
-Client.msi.LOG -Records setup tasks performed by client.msi.
Step 4: Verifying from collections.
 Go to Collections > All Systems. For computer which already install with sccm client will indicated
Client - Yes
Site Code - LAB
Approved - Approved.
Now you've successfully installed sccm client into the workstation.
