Search This Blog

Friday, December 17, 2021

Remove Veeam CDP IOFilter Manually

You may already refer to this guide (https://www.veeam.com/kb4151) on how to remove Veeam CDP IOFilter. However, after checking, you may notice that veeamcdp is still existed on ESX.


Next step to manual remove is 

1. Set Host as maintenance mode

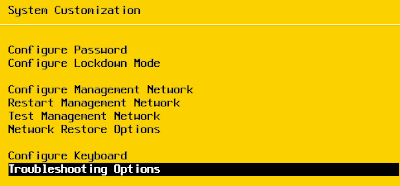
2 .Go to local ESXi Shell on the host. Make sure you have enabled on Troubleshooting options > Enable Esxi Shell


3. Press Alt + F1 to access ESXi Shell

4. Provide the credential

5. Execute command

"esxcli software vib list" to list and confirm the name of the filter

"esxcli software vib remove -n veecdp" to remove the filter


6. Exit the Esxi Shell by Press Alt + F2

7. Exit the maintenance mode & do not require to reboot the esx host


Thursday, December 16, 2021

Assemble Minisforum HX90

 Hi folk,


Today i'm going to share our new server for our lab purpose. Pre-order HX90 from Minisforum in Nov, select the barebone model & target to ship on early Dec 2021. 

During Nov, I start to order my remaining parts


  • 1 unit of Nvme 1TB - Kingston KC2500 (Total 1TB)
  • 2 units of SSD 1 TB - Kingston A400 (Total 2TB)
  • 2 units of ADATA SODIMM Memory - 32GB (Total 64 GB)

Requirement for memory that supported on this machine:

  • SODIMM
  • DDR 4
  • No XMP Support
  • CL 22
  • 1.2V
  • PC3200

You need to wait patiently when ordering from minisforum. Here is my shipping tracking:

  • Dec 1, 2021- Receive tracking info. The product has been sent for export custom clearance
  • Dec 11, 2021 - Product released by export custom. FedEx pick up product. In transit from Hong Kong.
  • Dec 12, 2021 - Transit to Taiwan -> Philipines -> China
  • Dec 13, 2021 - Transit from China -> Malaysia. Product cleared from custom & transit to local courier warehouse
  • Dec 14, 2021 - Safely received the product from FedEx at night. Shipping from FedEx was fast as it is International Priority Shipping.


Time for assembling the beast ....


Carefully unscrew, plug in memory, nvme & SSD. Complete the entire process within 30 minutes. You may want to check out the process from this youtube video: 

Final result:


The size is almost similar to mac mini m1 but a bit bulky. Power on the machine & configure BIOS.
Change VRAM setting to 2GB. The default setting set to 512MB. To learn how to change, click https://youtu.be/GDm-yPjJH8c 


Plug-in USB and install Windows 10. Don't trust the reliability of Windows 11 after hearing some several news on AMD bugs, printer drivers & recently nvme performance issues. The product can support Windows 11 if you want to.

Install the drivers provided by Minisforum. You can download it from https://www.minisforum.com/support/38

Audio driver, AMD Chipset & Graphic, you need to download from AMD:- https://www.amd.com/en/support


8 cores, 16 thread


64 GB RAM

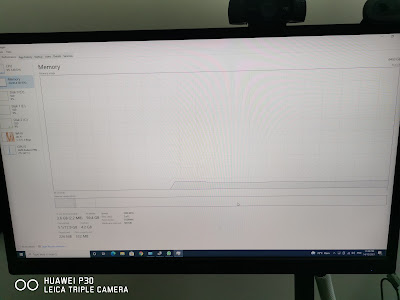
Benchmark review:- 


To learn more about the product specification, please feel free to visit Minisforum:- https://store.minisforum.com/products/hx90


Friday, December 10, 2021

Migrate Veeam Repository to New Repository

 In this video, you will learn how to move your backup data from one repository to another repository.

Backup and Restore KVM Using Veeam

 In today's video, we will share how to backup Redhat virtualization, agentless using Veeam.

Tuesday, November 23, 2021

Backup and Restore Nutanix AHV using Veeam

Updated video to backup nutanix ahv using Veeam. This is the latest version veeam v11a & Veeam Backup for Nutanix AHV 3.0

Thursday, November 11, 2021

Video - Direct Restore to GCP Using Veeam

Check out below video on Veeam v11a new update on Google Cloud which allow you to perform VM restore from on-prem to GCP.

Friday, November 5, 2021

Direct Restore to GCP Issue

 You may have tried veeam feature on restoring backup data from on-prem to GCP using Veeam v11a.

If you encountered an error message like "Required 'compute.firewalls.create' permission" or network permission issue, then proceed to refer below workaround.

[Workaround]

You need to assign correct Google Compute Engine IAM User Permission.

Please refer to 

https://helpcenter.veeam.com/docs/backup/vsphere/gcp_iam_permissions.html?ver=110 

Do add an additional service account permission and Cloud Build service account permission

My example:

[Click on diagram to view in large view]

a) Service account. You need to refer to VBR Console on which service account that it create when establish connection to GCP


b) Cloud Build Service Account

Go to Cloud Build to identify your service account


Tuesday, October 12, 2021

Video : Migrate Container from Development Kubernetes Cluster to Production Cluster

Let explore how to move Kubernetes container that you have set up in the development Kubernetes cluster to the production cluster.  

Video : How to do sizing for Veeam Backup for O365?

 In this video, we will walk through how to do sizing for veeam backup for o365.

Thursday, October 7, 2021

Video - Setup Linux Hardened Repository for Veeam

In the previous guide, we have posted on step by step.

If you are interested in video, please feel free to view


Saturday, October 2, 2021

Learning Kubernetes and Kasten

I just completed free training provided by kasten & earned 3 badges. 

Want to learn more about kubernetes, learn how backup & recover kubernetes

Feel free to join free training https://learning.kasten.io/ 


Wednesday, September 22, 2021

Configure Veeam Hardened Linux Repository Using Ubuntu

In this post, we are going to perform format and partition disks for our veeam Linux repository. Once we have complete this process, we will start to configure our hardened Linux repository.

Follow the below steps:

[Check disk]

sudo fdisk -l


We got a new disk :- 350GB at /dev/sdb

[Partition]
Begin by partition the disk, set to gpt and create primary partition with the size 350GB

sudo parted /dev/sdb

mklabel gpt

make primary 0GB 350GB

quit

[Formatting]

Format as XFS file system, 

sudo mkfs.xfs -b size=4096 -m reflink=1, crc=1 /dev/sdb -f


[Mounting]

sudo mkdir repo
sudo mount /dev/sdb /home/laiys/repo

[Check the mount point]

df -hT


[Set mount point as permanent]

vi /etc/fstab

/dev/sdb /home/laiys/repo xfs defaults 0 0

save it


[Create a non root user]

Scenario: 
username : veeam
group: veeamgroup
path : /home/laiys/repo

Create a user called "veeam"

sudo adduser veeam

Create group name "veeamgroup'
sudo groupadd veeamgroup


Add user to group

sudo usermod -a -G veeamgroup veeam

Check user in which group
groups veeam


[Set permission]

chown -R veeam:veeamgroup /home/laiys/repo
sudo chmod 700 /home/laiys/repo

[Add Veeam Repository]

When add a new repo, remember to select "Single use credentials for hardened repository"


Enter non root credential that you have created earlier
You may encounter this error message when trying to add a user without sudo right.


Workaround, temporary add 'veeam' to sudo group

sudo usermod -a -G sudo veeam

Repeat the step to use "single-use credential" again. This round you can proceed to install Veeam Transport and Data Mover.


Once complete, remove sudo right from veeam account

sudo deluser veeam sudo


Proceed to add the repo


Set fast clone on XFS
Set backup immutable for 7 days


That's all . Now you have successfully set up a hardened Linux repository.


Tuesday, September 7, 2021

Setup VPN Tunnel Using Two Asus Router

 We will look on how to setup VPN tunnel between two sites using Asus router.

Subnet:

Main Site: 192.168.0.0/24

DR Site: 192.168.1.0/24

Here is my configuration:-

Main Site 

Using ASUS RT-AC1300 UHP

Configure using Open VPN - act as VPN Server

1. Go to Advanced Settings | VPN | VPN Server | OpenVPN

2. Enable OPENVPN Server & click on Advanced Settings for VPN Details

3.Set

Interface Type: TUN

Respond to DNS: Yes

Advertise DNS to clients: Yes

Push LAN to clients: Yes

Direct clients to redirect Internet traffic: No (as each site uses their own internet access for external traffic)

Manage Client-Specific Options: Yes

Allow Client <-> Client: Yes

Allow only specified clients: Yes

Common name: client

Subnet : 192.168.1.0

Mask: 255.255.255.0

Push : Yes

4. Click Apply


5.Create a new username & password

6. Export the openvpn configuration file to DR site

DR Site

Using ASUS RT-N18U

Configure using Open VPN - act as VPN Client

1. Go to Advanced Settings | VPN | VPN Client | Add profile


2. Add the user credential that you have created previously & upload the open VPN configuration file

3. Click Activate

End Result


Connection established!

On Main Site Router indicated "Connected"


You are now able to RDP to the machine on both sites.


Wednesday, September 1, 2021

Video - Backup and Recover Using Kasten

 Quick run-through on how to backup and recover containers using Kasten.

Friday, August 13, 2021

Configuring Auditing for Veeam Backup for o365

 In this post, we will configure auditing for operation perform by operator on view and restore by using Veeam Explorer.

To do so,

1. Access to swagger

2. Get Auth Token first

Click Auth & provide correct credential


Once get the Response Code - 200. Go to top & click Explore

3. Get Organization Id
Go to Organization | GET | Try it out

Take the value id


Example:
Id: cbae9938-a613-43db-b145-a0db19f0b4fa

4. Get Organization User
Go to OrganizationUser | GET
Enter the OrganizationID


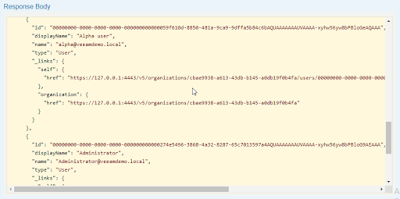
It will provide all users information.
Take note the ID, DisplayName and Name that you want to audit


Example:

"id": "00000000-0000-0000-0000-000000000000059f610d-8850-481a-9ca9-9dffa5b84c6bAQUAAAAAAAUVAAAA-xyhw56yw8bPBloGeAQAAA",
      "displayName": "Alpha user",
      "name": "alpha@veeamdemo.local",

 "id": "00000000-0000-0000-0000-000000000000274e5496-3868-4a32-8287-65c7013597a4AQUAAAAAAAUVAAAA-xyhw56yw8bPBloG9AEAAA",
      "displayName": "Administrator",
      "name": "Administrator@veeamdemo.local",

5. Let start to audit administrator@veeamdemo.local
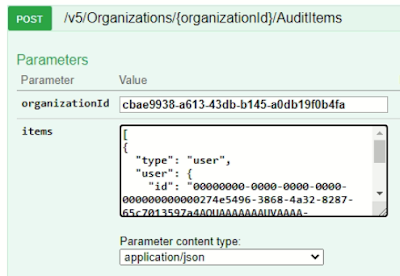
Go to OrganizationAudit | POST
Enter OrganizationID & Items

[ {   "type": "user",   "user": {     "id": "00000000-0000-0000-0000-000000000000274e5496-3868-4a32-8287-65c7013597a4AQUAAAAAAAUVAAAA-xyhw56yw8bPBloG9AEAAA",     "displayName": "Administrator",     "name": "Administrator@veeamdemo.local",     }   } ]


6. To verify
Go to OrganizationAudit | GET

Result listed as Response Code 200 and output in Response Body


You have successful enable auditing on administrator user. Next is enable auditing notification of the Audited Item.

7. Go to AuditEmailSettings | PUT

{
"enableNotification": true,
"smtpServer": "dc01.veeamdemo.local",
"port": 25,
"useAuthentication": true,
"username": "administrator@veeamdemo.local",
"userPassword": "P@ssw0rd",
"useSSL": true,
"from": "veeam@veeamdemo.local",
"to": "administrator@veeamdemo.local",
"subject": "VBO Audit - %StartTime% — %OrganizationName% - %DisplayName% - %Action% - %InitiatedByUserName%
}

Make sure result is Response Code 200.

Final step is verify by perform recovery on VBO Server


Error - WinRM Service cannot process the Request Because the Request needs to be sent to a different machine

 Encountered an error when adding on-prem exchange server using Veeam Backup for O365.


[Resolution]

You need to enable basic authentication.

1. Go to Exchange Administrative Center

2. Click on server | Virtual Directories | Powershell


3. Enable basic authentication


Try add again the organization.